 The Pacific War Online Encyclopedia
|
| Previous: Philippine Islands | Table of Contents | Next: Phillips, Sir Thomas S.V. |
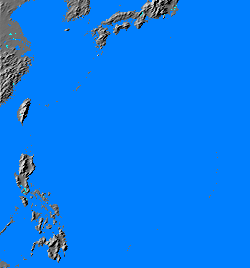
The Philippine Sea is a region of the western Pacific bounded by Japan to the north, the Bonins to the northeast, the Marianas to the east, the western Carolines to the south, the Philippines to the southwest, Formosa to the west, and the Ryukyus to the northwest. The ocean floor under the Philippines Sea is a crustal plate distinct from the Pacific plate to the east or the Asian plate to the west.
The Philippine Sea was the location of the
last major carrier
battle of the Pacific
war, which took place when Toyoda
activated the A-Go plan to
counter the American
invasion of the Marianas in June 1944. Because the American submarine blockade had crippled
the Japanese tanker fleet, the
Japanese were forced to base their main surface forces close to their
sources of fuel in Borneo. The Japanese plan therefore
called for a decisive battle to be conducted near the Palaus. Here the Japanese 1 Mobile
Fleet under Ozawa would
engage and destroy the Americans with the assistance of land-based aircraft.
Should the Americans choose to strike against the Marianas instead, the plan
called for the American fleet to be attacked by land-based air only,
and lured south into more favorable waters for the Japanese.
A-Go. As it became clearer
that the Marianas were a likely target for the Americans, the Japanese Navy
took the dangerous step of authorizing the use of unrefined Borneo oil
as bunker fuel. This was a desperate measure. Borneo oil was of high
enough quality to burn directly in ships' boilers, but it contained
enough sulfur to embrittle boiler tubing, and it also had enough
volatiles to be dangerously flammable. However, the use of unrefined
Borneo oil economized on tankers and made it possible for the fleet to
operate at a considerably greater distance from its fuel sources,
bringing the Marianas within range for a fleet action.
However, the Japanese continued to hope that the
Americans would strike to the southwards, as reflected in their
aircraft dispositions. By early June, there were 4 aircraft at Chichi Jima; 35 at Saipan; 67 at Tinian; 70 at Guam; 67 at Truk;
40 at Yap; 134 at Palau; 25 at Davao; 40 at Cebu; 42 at Halmahera; and 16 in western New Guinea. Additional aircraft
were available in the home islands and the Netherlands East Indies to
be staged in once A-Go was
activated, for a total of about 500 land-based aircraft on call for the
decisive battle.
The Japanese conducted a number of teishin ("daring") reconnaissance missions in
late May and early June that gave them a reasonably clear picture of
American dispositions. A reconnaissance flight on 27 May from Truk
staged through Buin to Tulagi and gathered accurate intelligence on Conolly's Southern Attack
Force. Another pair of aircraft staged from Truk through Nauru to reconnoiter the fast carrier forces at Kwajalein and Majuro. This information pointed to
an attack on the Marianas, but Imperial General Headquarters
was preoccupied with the Biak
landings, which threatened airfields
important to the A-Go plan.
Operation Kon failed in its
first two attempts to relieve Biak, and the third attempt was canceled
when Toyoda got word of carrier strikes on Saipan on 11 June, which
finally convinced the Japanese leadership that the Marianas were the
next American target. On 12 June Toyoda activated A-Go, and on 13 June Ozawa sortied
from Tawi Tawi. His force was
immediately observed by submarine Redfin.
Part of the Japanese plan called for scouting lines of
submarines to cover possible avenues of approach for the Americans.
These were almost completely unsuccessful, due largely to the efforts
of Allied code breakers, and no less than 17 of
the submarines were lost. Not a single submarine was in position to
influence the subsequent fleet action.
The Balance Sheet. The
Japanese fleet was considerably weaker than the American fleet. The
Americans had 7 fleet carriers
and 8 light carriers to the
Japanese fleet's 5 fleet and 4 light carriers. The Americans were
superior in every other category of ship except heavy cruisers.
The Americans
had an overwhelming advantage in carrier aircraft, with 891 embarked,
compared with 430 aircraft embarked on the Japanese carriers. However,
the Japanese aircraft had a considerable range advantage, being able to
scout to 560 miles (1040 km) versus 350 miles (650 km) for the
Americans and to attack at 300
miles (560 km) versus 200 miles (370 km) for the Americans. In
addition, Ozawa would be sailing
into the wind and thus could conduct flight operations while closing
with the Americans. Ozawa planned to launch his carrier aircraft from
outside
the range of American counterstrikes and have them refuel and rearm at
Guam, effectively doubling their strike value. However, this came at
the cost of increasing pilot fatigue during the long flight to their
targets.
But the advantage Ozawa counted most heavily on was the proximity of Japanese airfields, particularly at Guam, Rota, and Yap. As noted above, Ozawa believed he could count on the support some 500 land-based aircraft, which would have given him a slight numerical advantage over the Americans. It was here that the Japanese plan first began to break down. By the eve of battle on 18 June, Kakuta's land-based aircraft had accomplished next to nothing while suffering heavy casualties and damage to their bases.
The Japanese were beginning to equip their air groups with more modern light bombers, such as the D4Y "Judy" dive bomber and the B6N "Jill" torpedo bomber. However, many of the carrier air groups still included significant numbers of the older D3A "Val" dive bombers, which were too slow to keep formation with the newer models.
The most important Japanese handicap proved to be the
poor training of the Japanese aircrew.
The American pilots who fought in the battle all had no less than two
years' training and 300 hours' flying time. By contrast, the Japanese
had never been able to properly rebuild their air groups following
heavy losses in the Guadalcanal
campaign. The pilots with Ozawa's best carrier division averaged just
six month's training, while those with Carrier Division 3 averaged
only three months and those with Carrier Division 2
just two
months. Training was further hampered by the decision to shift the
carrier fleet to Tawi Tawi in the months before the battle: The
base was located so close to the equator that there were no trade winds
to enable the slower carriers to get enough headwind to launch the most
modern carrier aircraft. The Japanese aviators were simply no match for
the Americans.
The Search Phase.
On
receiving Redfin's report
that Ozawa had sortied on 13 June, Spruance calculated that there was
still time to raid the airfields on Iwo
Jima and Chichi Jima, knocking out the air bridge from Japan to
Guam. The strikes were conducted by Task Groups 58.1 (Clark) and 58.4 (Harrill), which headed
north on 14 June, launched strikes on the afternoon of 15 June and
morning of 16 June, and was back with Spruance's main force by 18 June.
The strikes destroyed at least 68 Japanese aircraft at the cost of 4
American aircraft. A number of small Japanese freighters were also
wrecked.
Ozawa's force
was again sighted late on
15 June by submarine Flying Fish, patrolling near
San Bernardino Strait in the Philippines.
An hour later Seahorse sighted Ugaki's battleship force coming north to
join Ozawa. Spruance recalled Task Groups 58.1 and 58.4 and began
assembling his carrier forces west of the Marianas. The
landings on Guam,
scheduled for 16 June, were postponed.
Cavalla sighted a Japanese oiler group just before dawn on 17 June. The American submarine unsuccessfully attempted to follow the group but later in the day found herself directly in the path of the main Japanese carrier group. This sighting report reached Spruance early in the morning of 18 June. Mitscher, Spruance's carrier commander, suggested racing west for a night engagement that evening, but Lee, commanding the battleships, strongly urged against seeking a night engagement due to lack of recent training in night tactics. Spruance also made the controversial decision to remain close to the amphibious forces off Saipan rather than sail towards the oncoming Japanese to close the range. His decision was influenced by intelligence obtained from Filipino guerrillas, who had captured Japanese plans that discussed the possibility of an end-run by Japanese surface forces after the main American fleet had been lured away by Japanese carrier forces. This was, in fact, the strategy that would later be employed by the Japanese at Leyte Gulf.
American reconnaissance aircraft
just missed spotting Ozawa on 18 June. Ozawa inexplicably got no
reconnaissance reports whatsoever from Japanese land-based air forces.
However, Ozawa's own scout planes sighted the American force
late on 18 June. One of Ozawa's carrier division commanders, Obayashi (CarDiv3), promptly began
launching a strike against the Americans, but this was recalled just a
few minutes later when Obayashi received Ozawa's battle plans. This may
have been a missed opportunity for the Japanese, as Mitscher was
unaware any Japanese carriers were within strike range and might have
been caught by surprise at dusk.
Further reports came in to Spruance on the night of
18/19 June. By this time his carrier groups were arranged in a line
from north to south, allowing each to conduct flight operations without
interfering with one another, and the battle line had been formed to
their west. A little before midnight, Spruance received an accurate
position report for the Japanese via HF/DF
that put them 300 miles (560 km) west-southwest of the Americans.
Mitscher
wanted to head west to strike at dawn, but Spruance was still worried
about a Japanese end run and, after discussing the matter with his
staff for an hour, refused. Spruance' caution was further reinforced by
a report that submarine Stingray, located 175 miles
(320 km) east-southeast of the HF/DF detection, had sent a garbled and
unreadable transmission that Hawaii
evaluated as having been jammed by the Japanese. Spruance believed that
this was a contact report of a much closer Japanese attempting the very
end run he feared, with the HF/DF detection possibly being a deception.
Spruance kept the fleet on its eastward course:
We were at the start of a very large and important amphibious operation and we could not gamble and place it in jeopardy. The way Togo waited at Tsushima for the Russian Fleet to come to him has always been in my mind. We had somewhat the same basic situation.
The situation might have been clarified if Spruance had
received a timely report from a radar-equipped
PBM out of Saipan which, at 0115 on
19 June, detected over 40 ships some 75 miles (140 km) northeast of the
HF/DF detection. But, for reasons that have never been adequately
explained, the report did not reach Spruance until after 0800. Spruance
knew the approximate number of ships available to Ozawa, and this
report would have accounted for almost all of them, ruling out a
Japanese end run in any force. But, as it was, a night search by
radar-equipped TBFs in the
early hours of 19 June turned back just 40 miles (75 km) east of
Ozawa's leading elements. In the meanwhile, Japanese snoopers had
confirmed the approximate position of the American fleet.
"The Great Marianas
Turkey Shoot." Kakuta had had little success building up air
strength in the Marianas,
in part due to poor weather over
the staging bases and in part due to the
earlier American strikes against the Bonins and Iwo Jima. On the
morning of 19 June, Japanese air strength at Guam numbered just 50
aircraft out of the 500 that had been promised. Nevertheless, beginning
at 0530, the American fighter
cover began intercepting land-based aircraft. For the next four
and a half hours, the American fleet vectored Hellcats against Japanese
aircraft over Guam, destroying 30 fighters and 5 bombers.
Ozawa had formed up his fleet at 0400, with the three
light carriers of Carrier Division 3
and most of his heavy surface units in the van, and the remaining five
fleet and one light carriers of Carrier Division 1 and Carrier Division 2 about 100
nautical miles (185 km) to the rear. The van formation carried most of
Ozawa's search seaplanes and,
with its heavy antiaircraft
screen, was meant to absorb any American counterattack. However, this
left the antisubmarine screen for the rear group dangerously weak.
Ozawa planned to launch his strikes from over 300 miles (560 km) out,
where his ships would be out of
range of any American
counterattack.
Ozawa launched his first search group, 16 Jake seaplanes from the van
battleships and cruisers, at
0445. One of these sighted part of the American fleet at 0730. A second
search group of a Jake and 13 Kates
was launched at 0515 and lost half its number to the American fighter
patrol without sighting anything but a few destroyers. Another group
consisting of 11 Judys and two
seaplanes from Mogami was launched at 0530.
The first Japanese strike (Raid I), consisting 16 Zero fighters, 45 Zero
fighter-bombers, and 8 Jills, was
launched at 0830 by Carrier Division
3. These were
detected by American radar at 1000 at a distance of over 150 miles (280
km). Mitscher promptly recalled the fighters over Guam and, at 1019,
gave the order to launch all available fighters from his carriers. All
carrier groups turned into the wind and commenced launching at 1023,
with the Japanese 75 miles (140 km) away. The Japanese strike paused to
regroup at about this time, giving the Americans time to stack their
fighters at a suitable altitude for interception and to fly off all
bombers on their flight decks. Raid I was intercepted by over 30
fighters and lost 42 aircraft to the Hellcats and the American
antiaircraft fire, at a cost to the Americans of a single fighter and a
bomb hit on South Dakota that killed 27 men
but did negligible structural damage.
The second Japanese strike (Raid II) was the largest of
the day. It was launched from Carrier
Division 1 and Carrier
Division 2 at 0856 and was composed of 53 Judys, 27 Jills, and
48 Zeros. Raid II made the mistake of flying over the Japanese van
group and lost two aircraft to friendly
fire from the nervous gunners. Another eight were damaged and
forced to return to their carriers. Raid II was detected by American
radar at 1107 at a distance of 115 miles (210 km) was intercepted
at 60 miles (110 km) by the Hellcats, which shot down about 70 Japanese
aircraft. The surviving Japanese wasted much of their firepower on
unsuccessful attacks on picket destroyer Stockham,
then attacked Lee's battle line. One Jill struck Indiana at the waterline, but
its torpedo failed to explode. A small group of Judys broke through to Montgomery's task group
and scored some very near misses on Wasp and Bunker
Hill. The Japanese lost a total of 97 aircraft from Raid II.
Raid III was launched at 1000 from Carrier Division 2 and consisted of
15 Zero fighters, 25 Zero fighter-bombers, and 7 Jills. This group was
diverted too far north by a garbled report from the third
reconnaissance group. Most returned to their carriers, but about 20
received a corrected sighting report and turned south, avoiding Lee's
battle line and attack Clark's task group. They were detected 99 miles
(180 km) out and intercepted at 1300 at a distance of 50 miles (90 km)
by 40 Hellcats. Seven Japanese aircraft were lost.
At this point there was a brief lull in the battle,
during which Mitscher sent out a search mission. It failed to find the
Japanese fleet.
Raid IV was launched at 1100 from Carrier Division 1 and Carrier Division 2. It consisted of
30 Zero fighters, 9 Judys, 27 Vals,
10 Zero fighter-bombers, and 6 Jills. These were also mislead by the
garbled sighting report from the third reconnaissance group and found
no targets at first. One group headed for Rota. On the way, they ran
across Montgomery's task group but were unable to score any hits. A
somewhat larger group headed for Guam. These aircraft had already
jettisoned their ordnance in preparation for landing when they were
intercepted by 27 Hellcats from Cowpens, Essex,
and Hornet. Many of the Japanese
planes had lowered their landing gear and were sitting ducks. The
Hellcats destroyed 30 out of the 49 aircraft, and the remaining 19
landed in such a damaged state that they were judged beyond repair. A
total of 73 aircraft out of the 82 in Raid IV were destroyed or damaged
beyond repair.
The swarms
of Hellcats
that intercepted the four Japanese strikes were expertly directed to
their
targets
from the
Combat Information Centers (CICs) of the American carriers.
Weather conditions were perfect for the Americans, with clear skies,
unlimited visibility, and the right humidity to form vapor trails.
Those Japanese aircraft
that got through the American fighter umbrella faced the lethal U.S. 5"/38
dual-purpose guns
of the American battleships
and
carriers. Damage to the American fleet was minimal, and about 315
Japanese aircraft were lost in the air, on the ground, or on sunken
carriers, against a loss to the Americans of just 27 aircraft. This
phase of
the battle was so one-sided that it became known as "The Great Marianas
Turkey
Shoot."
While the Hellcats were slaughtering the Japanese
carrier strikes, Spruance had ordered his own strikes against Guam. At
1040 Hornet launched a force
of 17 Helldivers and 7
Avengers escorted by 12 Hellcats to bomb Orote
Field. The field was struck again at 1300 by a group of SBDs that had been circling for
two hours after being launched from Lexington
to clear its flight deck. Other American bombers launched under similar
circumstances continued to attack throughout the day. Orote was
essentially shut down, and many of the aircraft from Raid IV that had
to be written off after landing had crashed on the bombed-out runway.
But this came at a heavy cost: Antiaircraft fire over Orote was
reportedly the worst yet encountered in the Pacific War, and the
Americans lost seven aircraft over the airfield.
Submarine Actions. Just
after Raid II was launched, the
brand-new Taiho
was
hit by a single torpedo from Albacore,
which had been forced to fire by "seaman's eye" after her fire control
computer was fed incorrect data. A second torpedo was sighted by
Warrant Officer Komatsu Sakio, who sacrificed himself to crash-dive on
the torpedo. Albacore was
then subjected to a halfhearted depth
charging and got clean away. Taiho
ought to have survived a single torpedo hit, but a gasoline tank had
been fractured, leaking gasoline into the well of the jammed forward
elevator. Inept damage control
led to a fatal
gasoline vapor explosion at 1532 that tore the carrier apart. Only
about 500 of the crew of 2150 were saved. The survivors included Ozawa
and his staff, who transferred to heavy cruiser Haguro
to continue directing the battle.
At 1152 Cavalla raised periscope to find herself close to a large Japanese carrier. This was the veteran Shokaku, which was maneuvering to recover aircraft. By 1220 Cavalla was in firing position and let loose with six torpedoes, the last two fired on the way down as a Japanese destroyer was rapidly closing in. Shokaku was fatally struck by four torpedoes, sinking shortly after 1500. Cavalla was subjected to a brutal depth charging, dodging 106 depth charges over the next three hours, but she also got away.
American Counterattack.
Spruance was finally
convinced that a Japanese end run was highly unlikely, and at 1500 on
June 19 he gave Mitscher,
permission to pursue Ozawa's fleet. Mitscher left Harrill's group,
which was low on fuel, to continue interdicting the airfields on Guam
and Rota, and he pursued the Japanese with this remaining three carrier
groups. Because these were recovering aircraft, they were unable to
head west until 2000, and Mitscher dared not steam faster than 23 knots
in order to conserve fuel. However, Ozawa was unaware of the extent of
his
aircraft losses on 19 June, believing that most of his aircraft had
landed
safely on Guam, and he was slow to disengage. As a result, the
Japanese
fleet was finally
located by American search planes at 1540 on 20 June.
Though the enemy was at
extreme range and
it was late in the day, the aggressive Mitscher launched a
strike of 85 fighters, 77 dive
bombers, and 54 torpedo
bombers. The strike reached the Japanese just as the sun was
setting, but inflicted only
modest damage, sinking carrier Hiyo and oilers Genyo
and Seiyo Maru and damaging
carriers Zuikaku, Junyo,
and Chiyoda and battleship Haruna.
Ozawa got about 75 planes into the air, which intercepted the Americans
very close to the Japanese ships and shot down a number. Other ran out
of fuel on the long flight back to their carriers, and over eighty
aircraft failed to make it back,
though Mitscher accepted the risk of turning on the carrier's
running lights, deck lights, and searchlights to guide
them in after dark. All but 49 of the aircrew were eventually rescued.
It was not just the Americans who suffered from night
landings. Ozawa's fighters did not begin landing until 1930 on 20 June,
and many ditched or cracked up on damaged flight decks. Ozawa found
that he had just 35 operational aircraft left. His halfhearted attempt
to seek a surface engagement, ordered at 1900, was canceled at 2205.
Toyoda had already ordered him to retire. None of Ozawa's remaining
ships had suffered damage to their machinery and Ozawa was able
to maintain a speed of 20 knots, ensuring his escape. Spruance
nevertheless pursued until late on 21 June in hopes of catching any
cripples. There were none, and Spruance called off the chase, ending
the battle, at 2030.
In spite of missed opportunities, the battle was a decisive American victory. Total Japanese air casualties were about 476 aircraft and 445 aviators, versus 130 aircraft and 76 aviators for the Americans. The Japanese carriers returning from the battle had only 35 aircraft left between them. The loss of Japanese carrier aircrew was so great that the battle spelled the effective end of Japanese carrier power.
| 5 Fleet (Spruance) |
||||||
| |
Task Force 58 Fast
Carrier Force (Mitscher) |
|||||
| |
Task Group 58.1 Carrier
Task Group 1 (Clark)
|
|||||
| |
CV Hornet |
|||||
| |
VB-2: 33
SB2C-1C Helldiver VF-2: 36 F6F-3 Hellcat VT-2: 4 TBF-1C Avenger, 15 TBM-1C Avenger VF(N)-76: 4 F6F-3N Hellcat |
|||||
| CV Yorktown | ||||||
| VB-1: 40
SB2C-1C Helldiver, 4 SBD-5 Dauntless VF-1: 42 F6F-3 Hellcat VT-1: 1 TFB-1C Avenger, 16 TBM-1C Avenger VF(N)-77: 4 F6F-3N Hellcat |
||||||
| CVL Belleau Wood |
||||||
| VF-24: 26 F6F-3 Hellcat VT-24: 3 TFB-1C Avenger, 6 TBM-1C Avenger |
||||||
| CVL Bataan |
||||||
| VF-50:
24 F6F-3 Hellcat VT-50: 9 TBM-1C Avenger |
||||||
| Cruiser
Division 10 (Thebaud)
|
||||||
| CA Boston |
||||||
| CA Baltimore | ||||||
| CA Canberra | ||||||
| CLAA San
Juan |
||||||
| CLAA Oakland |
||||||
| Screen |
||||||
| DD Izard |
||||||
| DD Charrette | ||||||
| DD Conner | ||||||
| DD Bell | ||||||
| DD Burns | ||||||
| Destroyer
Division 92 |
||||||
| |
DD Boyd
|
|||||
| DD Bradford |
||||||
| DD Brown |
||||||
| DD Cowell |
||||||
| Destroyer
Division 11 |
||||||
| DD Maury |
||||||
| DD Craven | ||||||
| DD Gridley | ||||||
| DD Helm |
||||||
| DD McCall | ||||||
| Task
Group 58.2 Carrier Task Group 2 (Montgomery)
|
||||||
| CV Bunker
Hill |
||||||
| VB-8: 33
SB2C-1C Helldiver VF-8: 38 F6F-3 Hellcat VT-8: 13 TFB-1C Avenger, 5 TBM-1C Avenger VF(N)-76: 4 F6F-3N Hellcat |
||||||
| CV Wasp |
||||||
| VB-14:
32 SB2C-1C Helldiver VF-14: 35 F6F-3 Hellcat VT-14: 15 TFB-1C Avenger, 3 TBF-1D Avenger VF(N)-77: 4 F6F-3N Hellcat |
||||||
| CVL Monterey | ||||||
| VF-28:
24 F6F-3 Hellcat VT-28: 8 TBM-1C Avenger |
||||||
| CVL Cabot | ||||||
| VF-31:
24 F6F-3 Hellcat VT-31: 1 TFB-1C Avenger, 8 TBM-1C Avenger |
||||||
| Cruiser
Division 13 (DuBose) |
||||||
| CL Santa
Fe |
||||||
| CL Mobile |
||||||
| CL Biloxi |
||||||
| Destroyer Squadron 52 | ||||||
| DD Owen |
||||||
| DD Miller |
||||||
| DD The Sullivans | ||||||
| DD Stephen
Potter |
||||||
| DD Tingey |
||||||
| Destroyer
Division 104 |
||||||
| DD Hickox | ||||||
| DD Hunt | ||||||
| DD Lewis
Hancock |
||||||
| DD Marshall | ||||||
| Destroyer Squadron 1 | ||||||
| DD MacDonough |
||||||
| DD Dewey |
||||||
| DD Hull |
||||||
| Task
Group 58.3 Carrier Task Group 3 (Reeves)
|
||||||
| CV Enterprise |
||||||
| VB-10:
21 SBD-5 Dauntless VF-10: 31 F6F-3 Hellcat VT-10: 9 TFB-1C Avenger, 5 TBM-1C Avenger VF(N)-101: 3 F4U-2 Corsair |
||||||
| CV Lexington |
||||||
| VB-16:
34 SBD-5 Dauntless VF-16: 38 F6F-3 Hellcat VT-16: 17 TFB-1C Avenger, 1 TBM-1C Avenger VF(N)-76: 4 F6F-3N Hellcat |
||||||
| CVL San Jacinto |
||||||
| VF-51:
24 F6F-3 Hellcat VT-51: 6 TFB-1C Avenger, 2 TBM-1D Avenger |
||||||
| CVL Princeton |
||||||
| VF-27:
24 F6F-3 Hellcat VT-27: 9 TBM-1C Avenger |
||||||
| CA Indianapolis |
||||||
| CLAA Reno |
||||||
| Cruiser
Division 12 (Hayler) |
||||||
| CL Monpelier |
||||||
| CL Cleveland | ||||||
| CL Birmingham | ||||||
| Destroyer
Squadron 50 |
||||||
| DD Clarence
K. Bronson |
||||||
| DD Cotten |
||||||
| DD Dortch |
||||||
| DD Gatling |
||||||
| DD Healy |
||||||
| Destroyer
Division 100 |
||||||
| DD Caperton |
||||||
| DD Cogswell |
||||||
| DD Ingersoll |
||||||
| DD Knapp |
||||||
| Destroyer
Division 90 |
||||||
| DD Anthony |
||||||
| DD Wadsworth |
||||||
| DD Terry |
||||||
| DD Braine |
||||||
| Task Group 58.4 Carrier Task Group 4 (Harrill) | ||||||
| CV Essex | ||||||
| VB-15:
36 SB2C-1C Helldiver VF-15: 39 F6F-3 Hellcat VT-15: 15 TBF-1C Avenger, 5 TBM-1C Avenger VF(N)-77: 4 F6F-3N Hellcat |
||||||
| CVL Langley | ||||||
| VF-32:
23 F6F-3 Hellcat VT-32: 7 TFB-1C Avenger, 2 TBM-1C Avenger |
||||||
| CVL Cowpens | ||||||
| VF-25:
23 F6F-3 Hellcat VT-25: 3 TFB-1C Avenger, 6 TBM-1C Avenger |
||||||
| Cruiser
Division 11 (Wiltse) |
||||||
| CLAA San
Diego |
||||||
| Cruiser
Division 14 (Baker) |
||||||
| CL Vincennes |
||||||
| CL Houston | ||||||
| CL Miami | ||||||
| Destroyer
Squadron 12 |
||||||
| DD Lansdowne |
||||||
| DD Lardner | ||||||
| DD McCalla | ||||||
| DD Case |
||||||
| Destroyer
Division 24 |
||||||
| DD Lang |
||||||
| DD Sterett | ||||||
| DD Wilson | ||||||
| DD Ellet | ||||||
| Destroyer
Squadron 23 |
||||||
| DD Charles
Ausburne |
||||||
| DD Stanly | ||||||
| DD Dyson | ||||||
| Destroyer
Division 46 |
||||||
| DD Converse | ||||||
| DD Spence | ||||||
| DD Thatcher | ||||||
| Task
Group 58.7 Battle Line (Lee) |
||||||
| Battleship Division 6 (Lee) | ||||||
| BB Washington |
||||||
| BB North Carolina |
||||||
| Battleship
Division 7 (Hustvedt) |
||||||
| BB Iowa |
||||||
| BB New
Jersey |
||||||
| Battleship
Division 9 (Hanson) |
||||||
| BB South Dakota |
||||||
| BB Alabama |
||||||
| Battleship
Division 8 (Davis) |
||||||
| BB Indiana | ||||||
| Cruiser
Division 6 (Joy) |
||||||
| CA Wichita |
||||||
| CA Minneapolis |
||||||
| CA New Orleans |
||||||
| CA San Francisco |
||||||
| Destroyer
Division 12 |
||||||
| DD Mugford |
||||||
| DD Ralph
Talbot |
||||||
| DD Patterson | ||||||
| DD Bagley | ||||||
| Destroyer
Division 89 |
||||||
| DD Halford | ||||||
| DD Guest | ||||||
| DD Bennett | ||||||
| DD Fullam | ||||||
| DD Hudson | ||||||
| Destroyer
Division 106 |
||||||
| DD Yarnall | ||||||
| DD Twining | ||||||
| DD Stockham | ||||||
| DD Monssen | ||||||
| Tender-based
Air (at Saipan) |
||||||
| AVD Ballard |
||||||
| VP-16: 5
PBM-5 Mariner |
||||||
| Task
Force 17 Patrol Submarines (Lockwood) |
||||||
| Bonin Islands |
||||||
| SS Plunger |
||||||
| SS Gar |
||||||
| SS Archerfish |
||||||
| SS Plaice | ||||||
| SS Swordfish |
||||||
| SE of Formosa and eastward |
||||||
| SS Pintado | ||||||
| SS Pilotfish | ||||||
| SS Tunny |
||||||
| E and SE
of Marianas |
||||||
| SS Albacore | ||||||
| SS Seawolf | ||||||
| SS Bang | ||||||
| SS Finback | ||||||
| SS Stingray |
||||||
| Ulithi-Philippines |
||||||
| SS Flying
Fish |
||||||
| SS Muskallunge | ||||||
| SS Seahorse | ||||||
| SS Pipefish | ||||||
| SS Cavalla |
||||||
| Off
Surigao Strait |
||||||
| SS Growler |
||||||
| 7 Fleet
Submarines (Christie) |
||||||
| SE of Mindanao |
||||||
| SS Hake
|
||||||
| SS Bashaw | ||||||
| SS Paddle | ||||||
| Tawi Tawi |
||||||
| SS Harder | ||||||
| SS Haddo | ||||||
| SS Redfin | ||||||
| SS Bluefish | ||||||
| Off Luzon |
||||||
| SS Jack | ||||||
| SS Flier | ||||||
| Mobile Fleet (Ozawa)
|
|||||
| |
Van
Force (Kurita) |
||||
| |
Carrier
Division 3 (Obayashi)
|
62 A6M Zero 9 B6N Jill 17 B5N Kate |
|||
| |
CVL Chitose |
||||
| CVL Chiyoda | |||||
| CVL Zuiho |
|||||
| Battleship
Division 1 (Ugaki) |
|||||
| BB Yamato |
|||||
| BB Musashi | |||||
| Battleship
Division 3 (Suzuki) |
|||||
| BB Haruna |
|||||
| BB Kongo | |||||
| Cruiser
Division 4 (Kurita) |
|||||
| CA Atago |
|||||
| CA Takao | |||||
| CA Maya | |||||
| CA Chokai | |||||
| Destroyer
Squadron 2 (Hayakawa)
|
|||||
| CL Noshiro |
|||||
| Destroyer
Division 31 |
|||||
| DD Naganami |
|||||
| DD Asashimo | |||||
| DD Kishinami | |||||
| DD Okinami |
|||||
| Destroyer
Division 32 |
|||||
| DD Tamanami | |||||
| DD Hamakaze |
|||||
| DD Fujinami | |||||
| DD Shimakaze |
|||||
| DD Hayanami | Sunk |
||||
| "A" Force (Ozawa) | |||||
| Carrier
Division 1 (Ozawa)
|
79 A6M Zero 70 D4Y Judy 7 D3A Val 51 B6N Jill |
||||
| CV Taiho |
Sunk |
||||
| CV Shokaku |
Sunk |
||||
| CV Zuikaku | |||||
| Cruiser
Division 5 (Hashimoto) |
|||||
| CA Myoko |
|||||
| CA Haguro | |||||
| Destroyer
Squadron 10 (Kimura) |
|||||
| CL Yahagi | |||||
| Destroyer
Divisions 10 and 17 |
|||||
| DD Asagumo |
|||||
| DD Urakaze | |||||
| DD Isokaze | |||||
| DD Tanikaze | Sunk |
||||
| Destroyer
Division 61 |
|||||
| DD Hatsuzuke |
|||||
| DD Wakatsuki | |||||
| DD Akizuki | |||||
| DD Shimotsuki | |||||
| DD Minazuki |
|||||
| "B"
Force (Joshima) |
|||||
| Carrier Division 2 (Joshima) | 81 A6M Zero 27 D4Y Judy 9 D3A Val 18 B6N Jill |
||||
| CV Junyo |
|||||
| CV Hiyo | Sunk |
||||
| CVL Ryuho |
|||||
| BB Nagato |
|||||
| CA Mogami |
|||||
| Destroyer
Division 4 |
|||||
| DD Michishio |
|||||
| DD Nowaki | |||||
| DD Yamagumo | |||||
| Destroyer
Division 27 |
|||||
| DD Shigure |
|||||
| DD Samidare | |||||
| DD Shiratsuyu | Sunk |
||||
| DD Hayashimo |
|||||
| DD Hamakaze | |||||
| DD Akishimo | |||||
| DD Harusame | Sunk |
||||
| Supply
Forces |
|||||
| 1 Supply
Force |
|||||
| AO Hayasui |
|||||
| AO Nichiei Maru |
|||||
| AO Kokuyo Maru |
|||||
| AO Seiyo Maru |
Sunk |
||||
| DD Hibiki |
|||||
| DD Hatsushimo |
|||||
| DD Yunagi |
|||||
| DD Tsuga |
|||||
| 2 Supply
Force |
|||||
| AO Genyo Maru | Sunk |
||||
| AO Azusa Maru |
|||||
| DD Yukikaze | |||||
| DD Uzuki |
|||||
| Submarine
Force (Takagi; at
Saipan) |
Missing in action |
||||
| SS I-5 |
Sunk |
||||
| SS I-10 |
Sunk |
||||
| SS I-38 |
|||||
| SS I-41 |
|||||
| SS I-53 |
|||||
| SS I-184 | Sunk |
||||
| SS I-185 | Sunk |
||||
| SS Ro-36 |
Sunk |
||||
| SS Ro-41 | |||||
| SS Ro-42 | Sunk |
||||
| SS Ro-43 | |||||
| SS Ro-44 | Sunk |
||||
| SS Ro-47 | |||||
| SS Ro-68 |
|||||
| SS Ro-104 |
Sunk |
||||
| SS Ro-105 | Sunk |
||||
| SS Ro-106 | Sunk |
||||
| SS Ro-108 | Sunk |
||||
| SS Ro-112 | |||||
| SS Ro-113 | |||||
| SS Ro-114 | Sunk |
||||
| SS Ro-115 | |||||
| SS Ro-116 | Sunk |
||||
| SS Ro-117 | Sunk |
||||
References
The Pacific War Online Encyclopedia © 2006, 2009, 2012 by Kent G. Budge. Index